MyBot Integration with WhatsApp
Follow this step-by-step guide to integrate WhatsApp with your chatbot. The goal of this integration is to let user chat with your bot via WhatsApp App.
Prerequisites
Ensure that you have the following requirements first to start this tutorial.
- MyBot account: You should have an existing MyBot account and a chatbot already created. If not, follow this tutorial to get started.
- Meta Developer account: You'll need a Meta (Facebook) Developer account to use WhatsApp Business API.
- Meta Business Portfolio You'll need a Meta Business Portfolio to create a Meta App
1. Create an App on Meta Developer Portal
If you already have a Meta App, you can skip this step.
Click on Create App in the top right corner of the Meta Developer Portal. Select a business portfolio from the dropdown list.
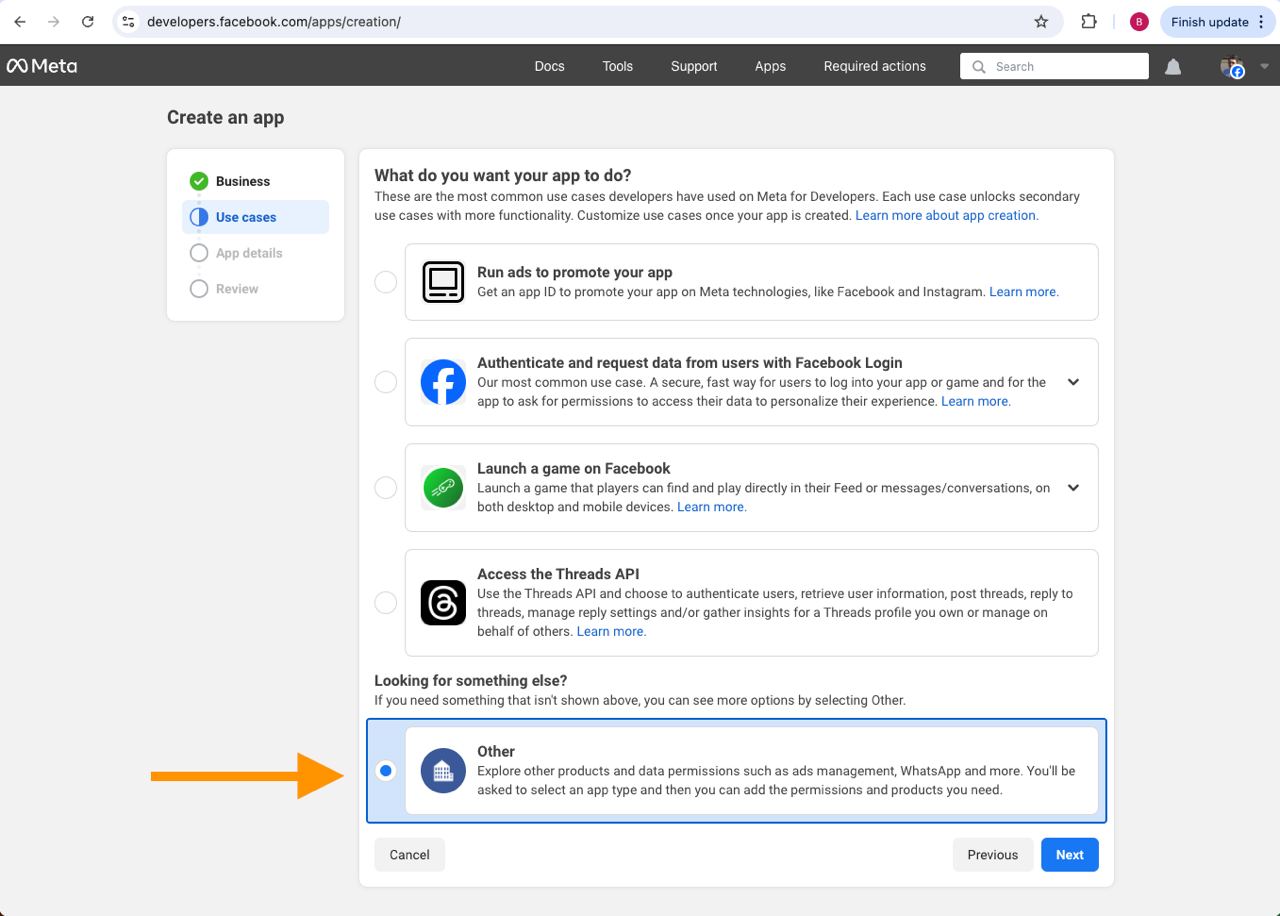
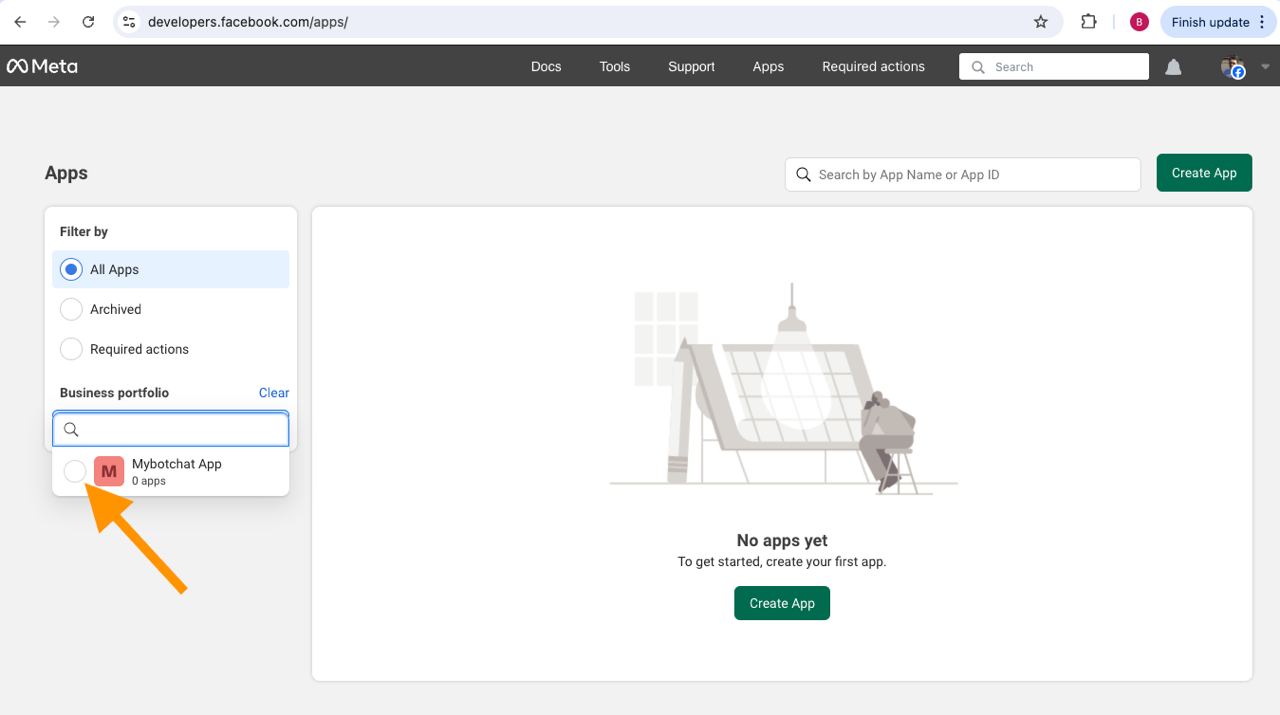 You should see this screen to click "Next"
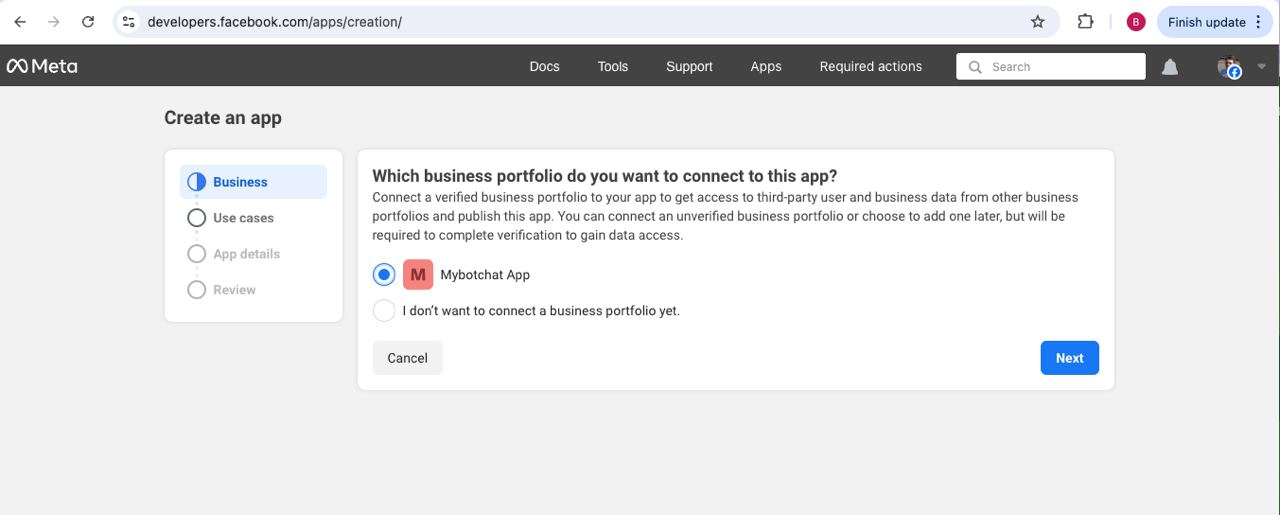
Choose Business as the app type, since WhatsApp Business API requires this.
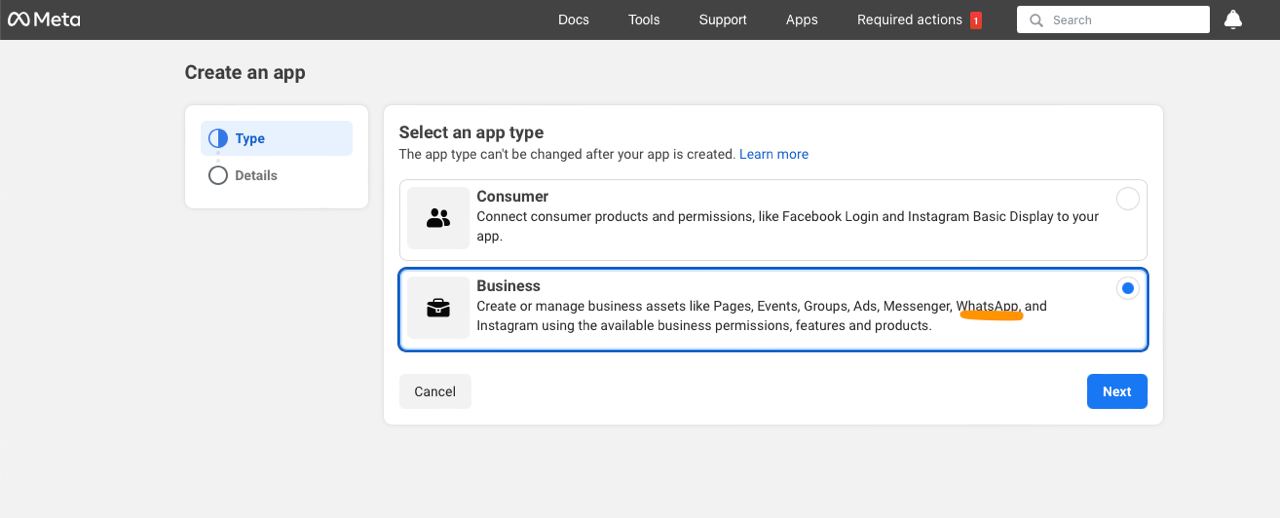
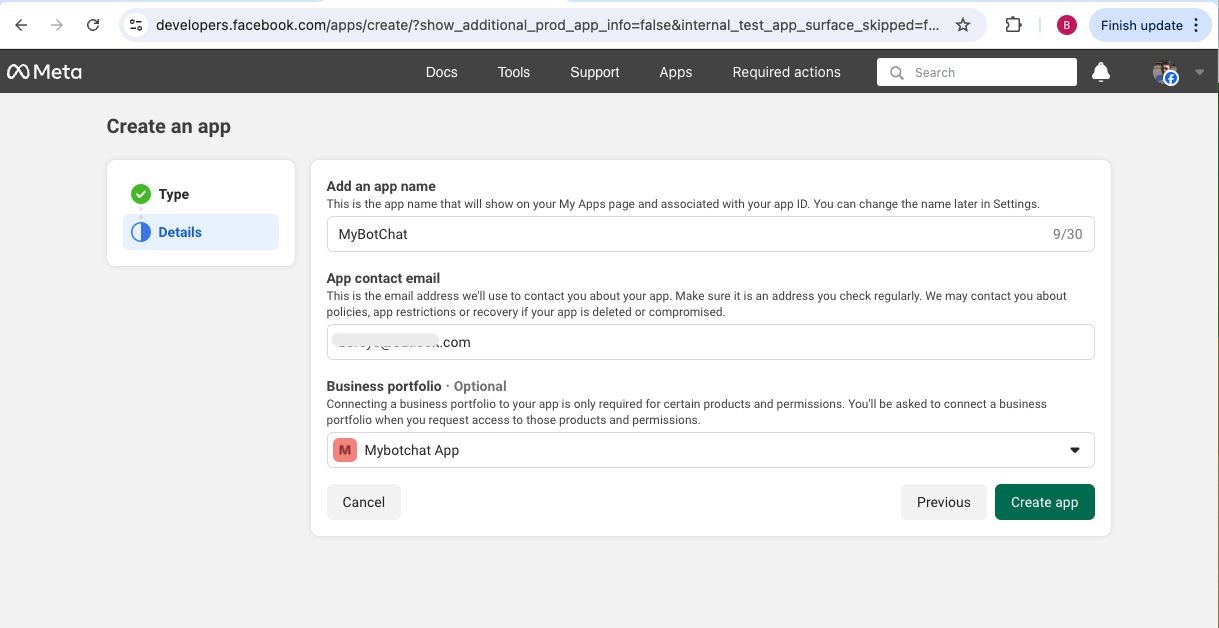
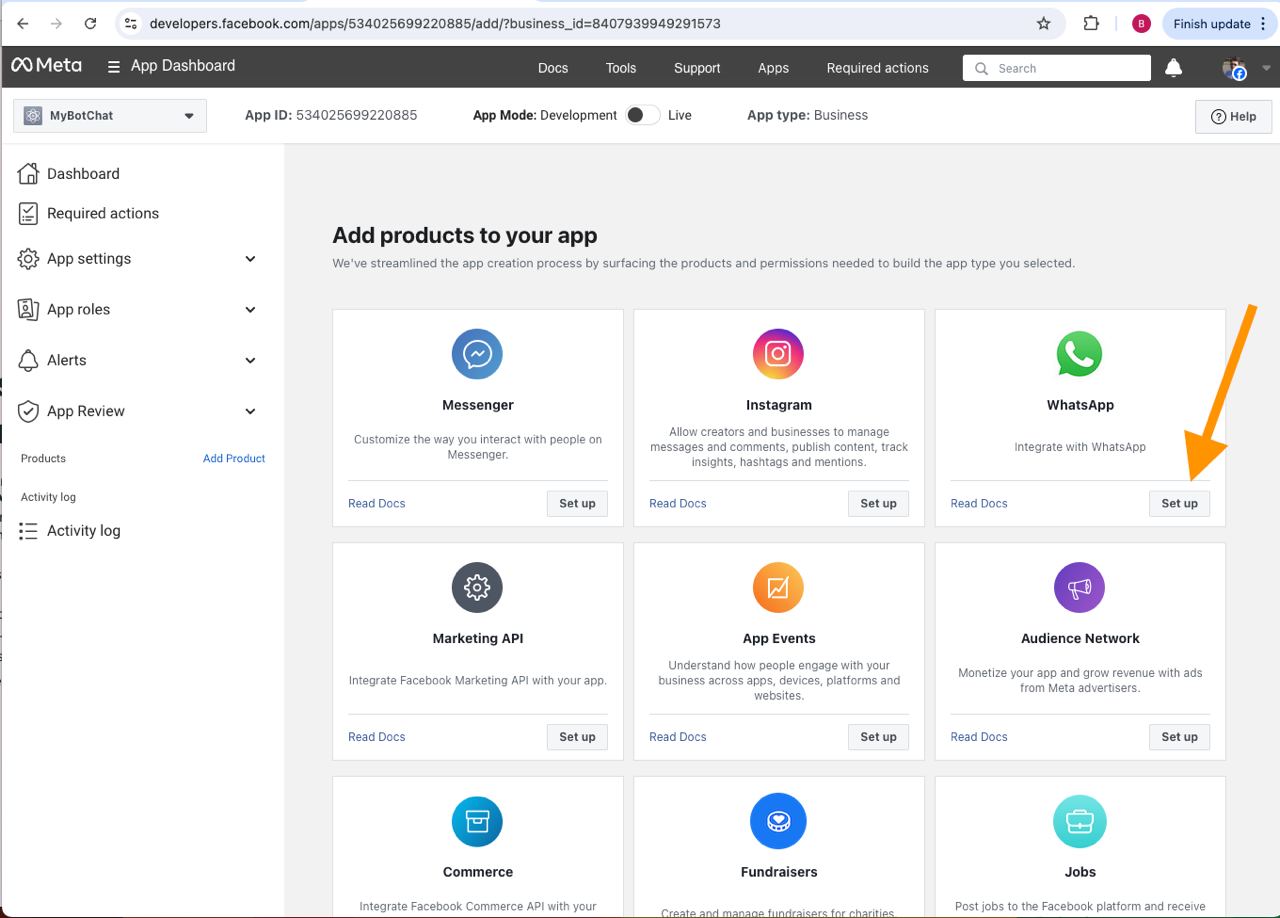
Click Create App to complete the app creation process. Then you shoud see the App dashboard
Once your app is created, it will be available for further configuration.
2. Register Your Phone Number
You need to register a phone number for WhatsApp Business if you do not have one yet. Otherwise skip this step.
- In your Meta Developer account, go to WhatsApp > Getting Started.
- Register your phone number by selecting Add Phone Number.
- Verify the phone number via SMS or a voice call.
- After verification, your phone number will be linked to the WhatsApp Business API.
3. Create WhatsApp Access Token for MyBotChat
This access token is used in MyBotChat to reply to user via WhatsApp API. Follow these steps to create a new Access Token.
Go to
business.facebook.comand select a business portfolio as in the screenshot below.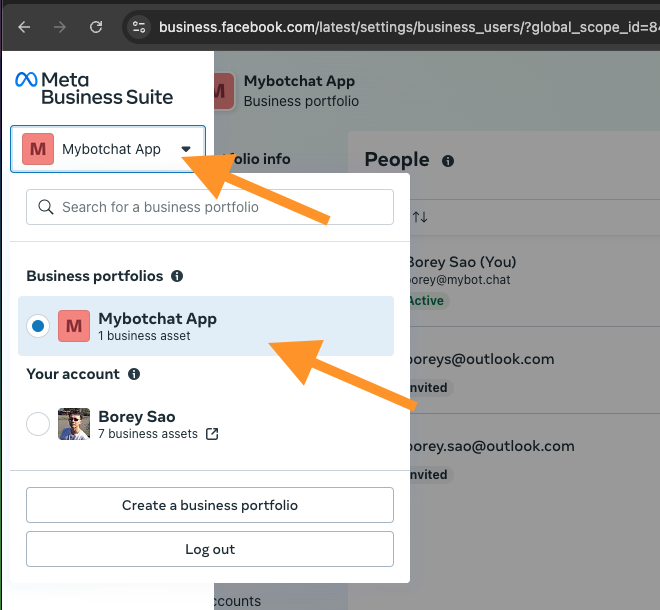
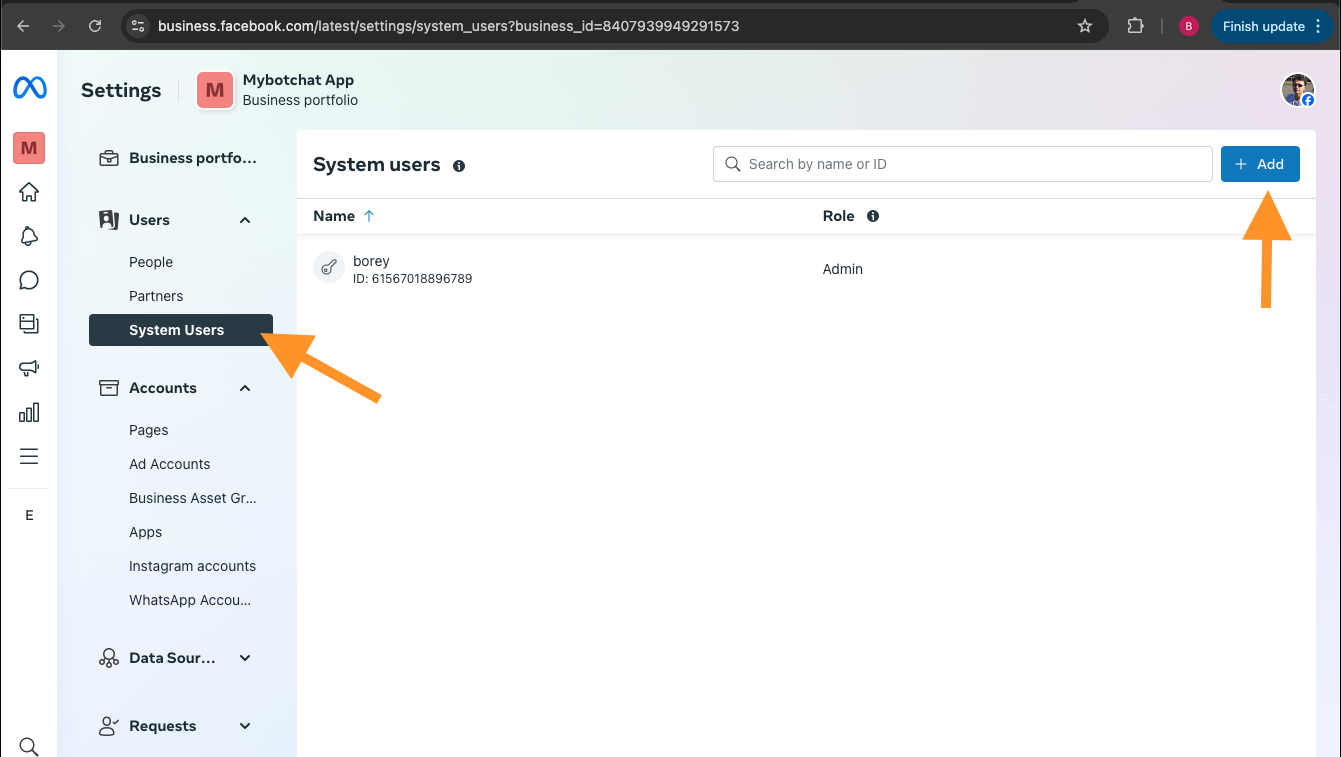
Under Users menu, select System Users and click "Add" on the top right button
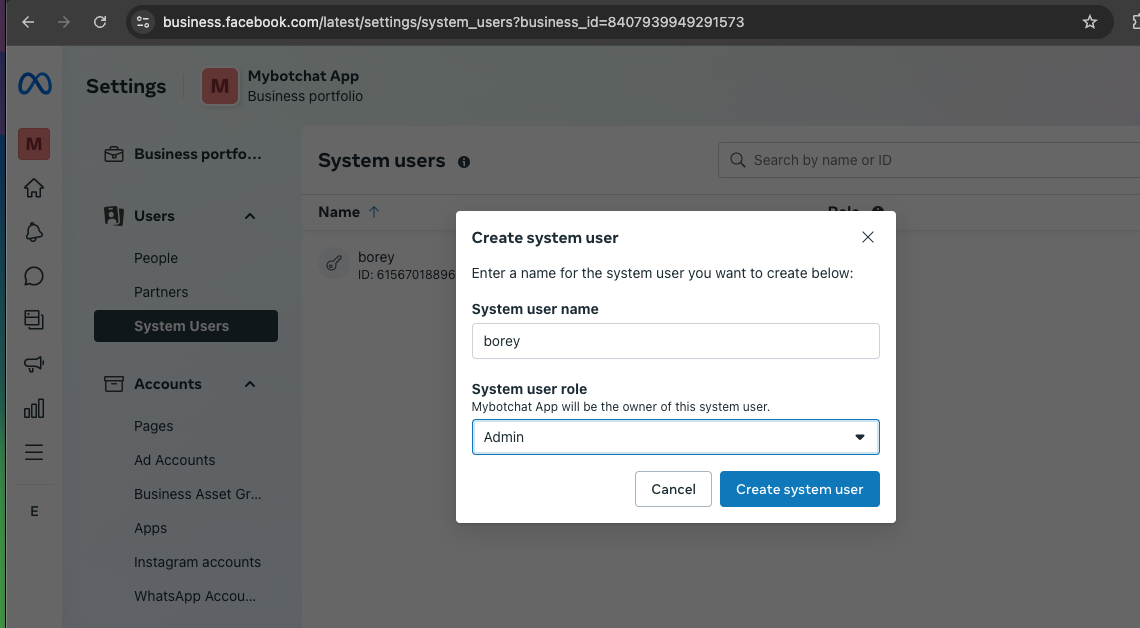
In this Popup form, fill out the required information and click "Create System User"
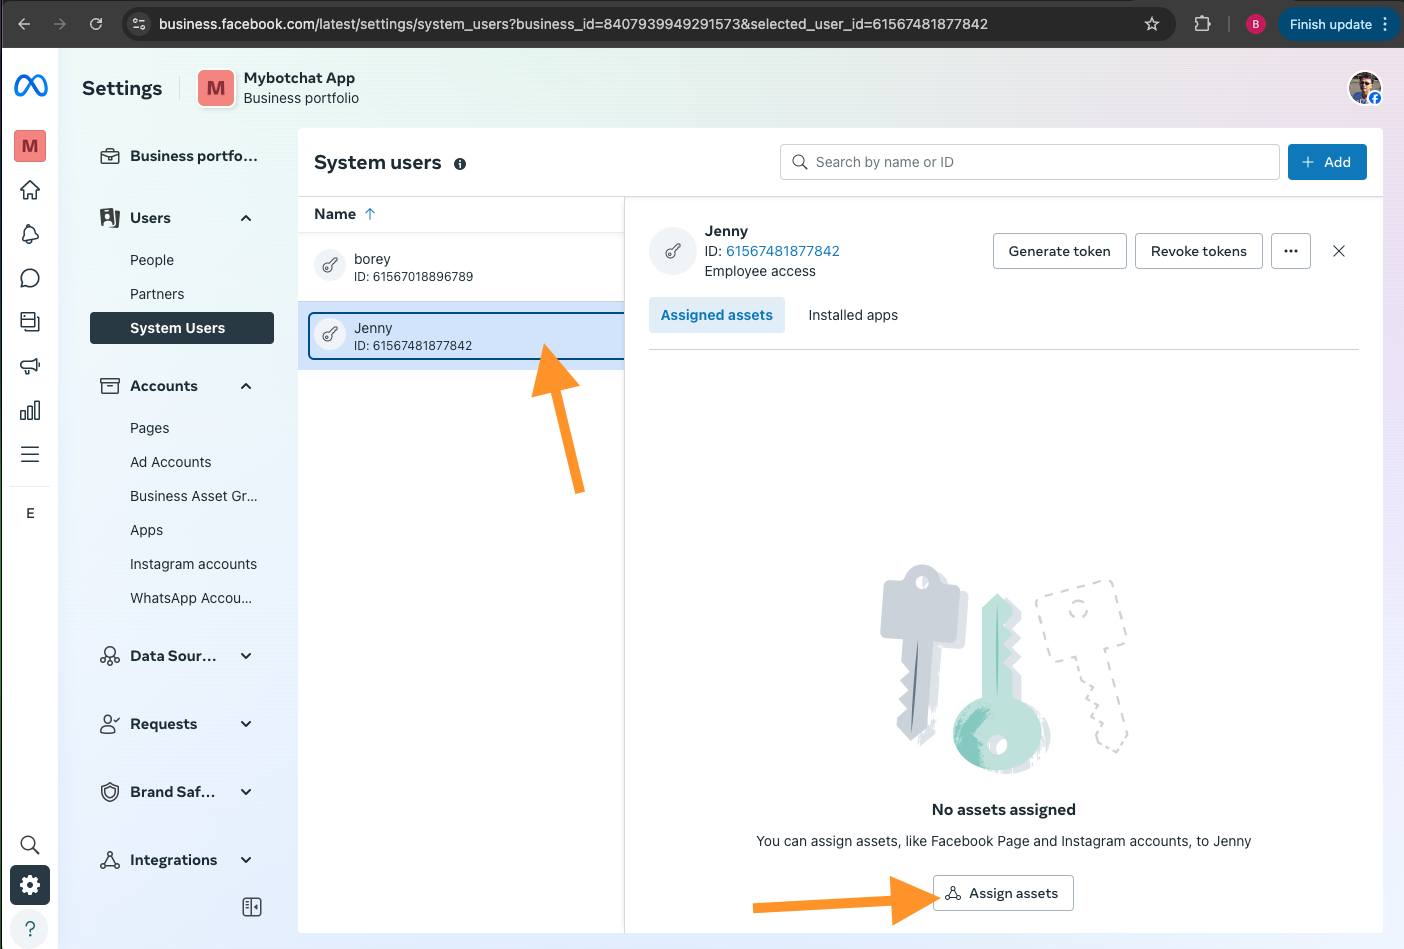
Select the new user you just created to see the page that look like below and click on "Assign Assets" button
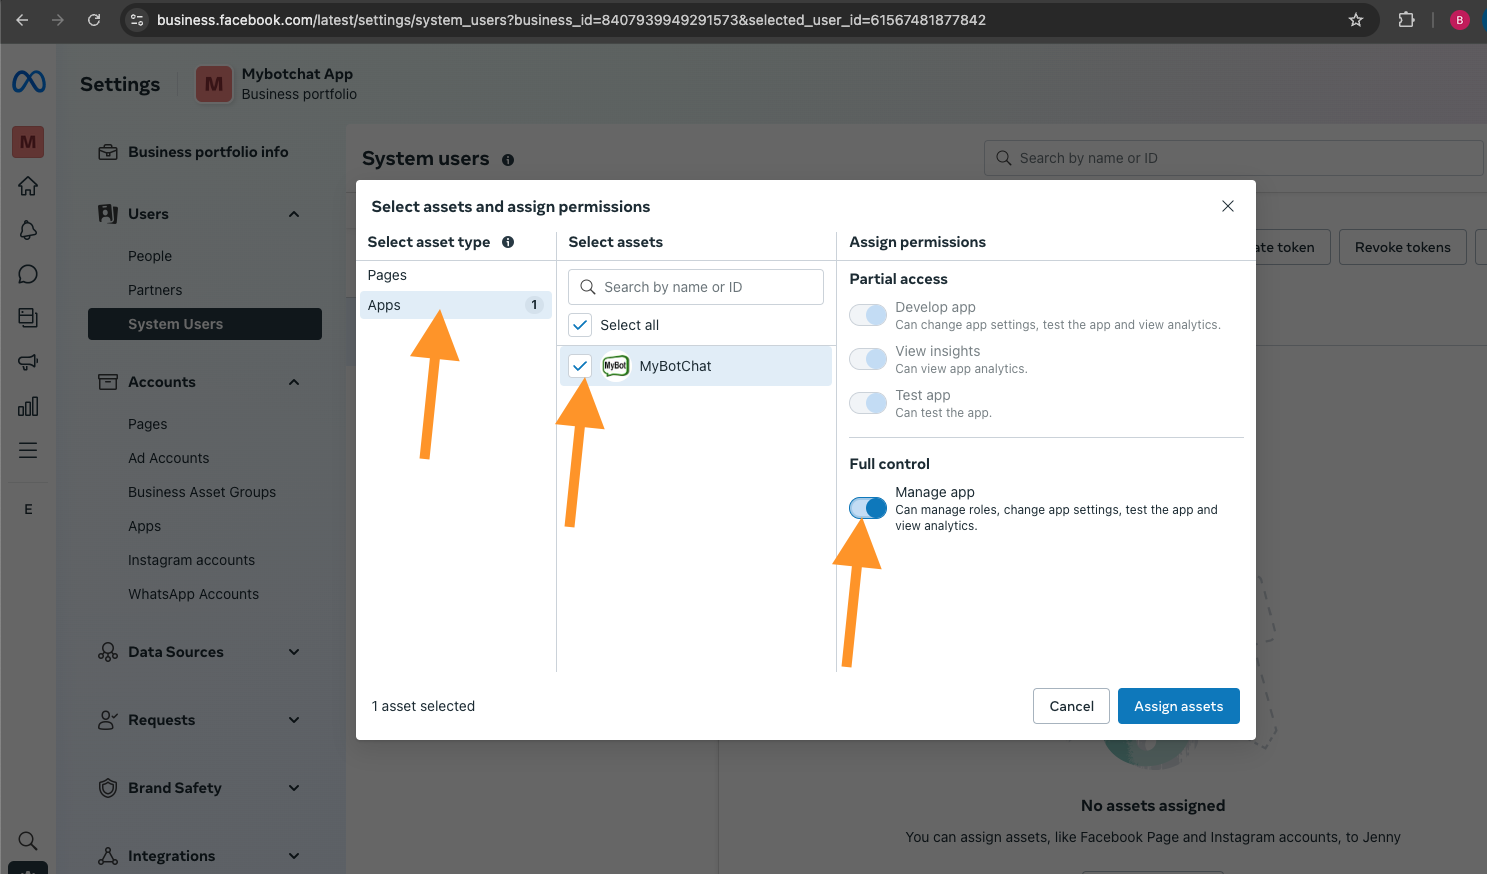
Select the App menu on this popup, then select your app and check "Full control" option before clicking "Assign assets' button to finish
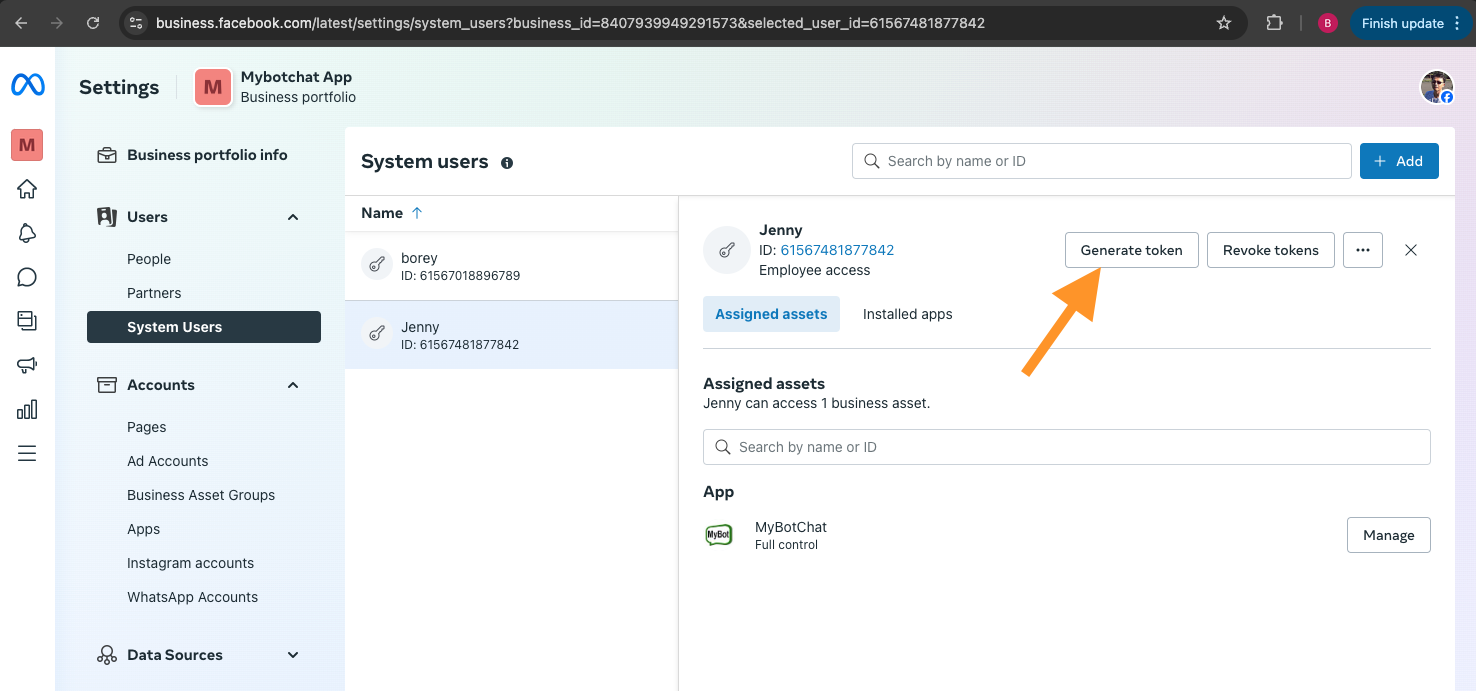
Now you should see similar page as below and click on the button "Generate token"
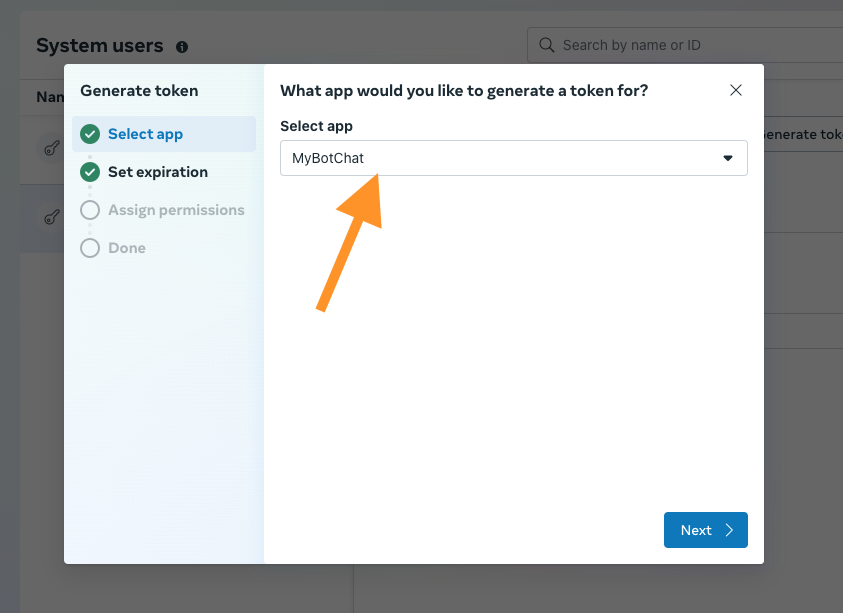
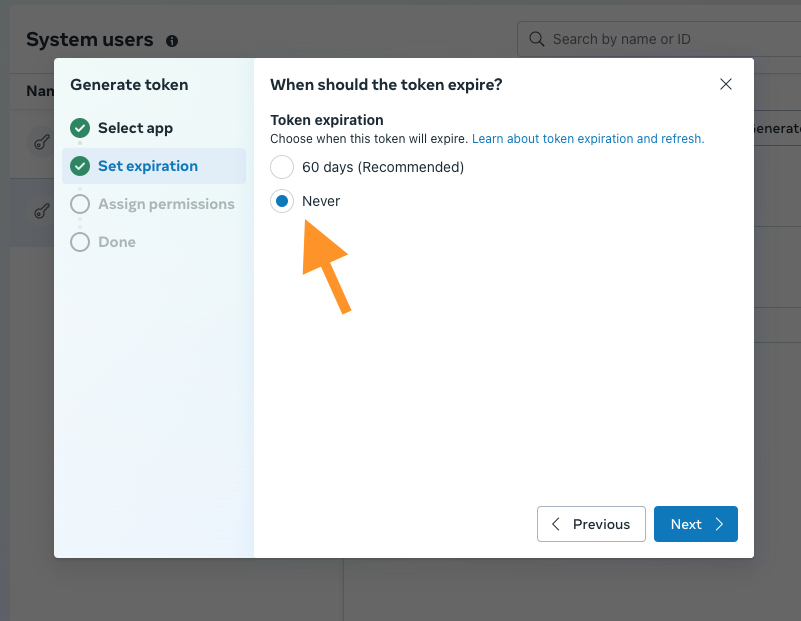
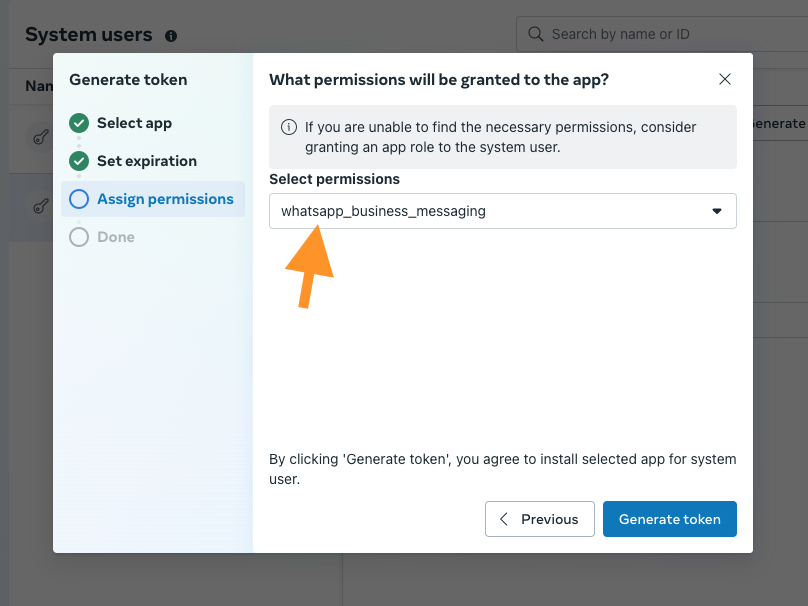
On this popup, select your app, then set expiration to never and assign message permission as in screenshot below
Select "Never" to not let this token expired anytime soon.
Select permission from dropdown list and click "Generate token" button below
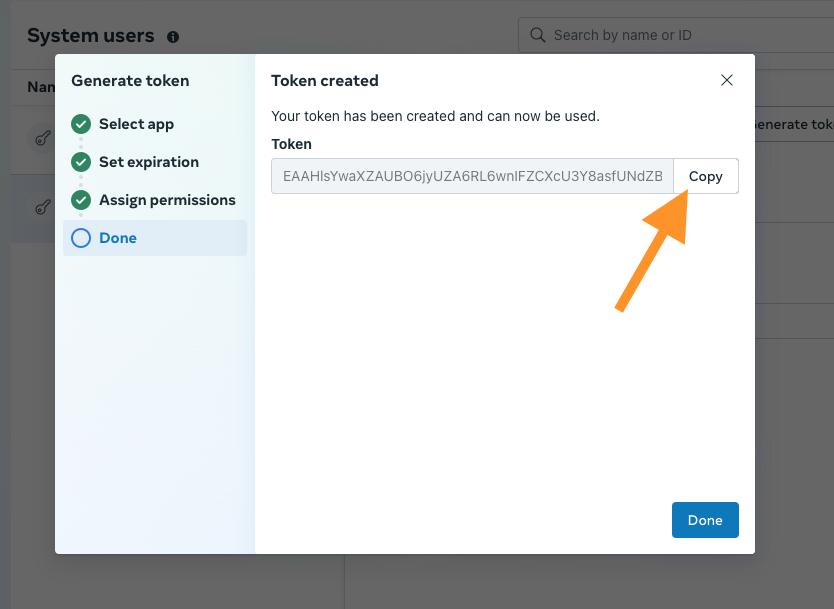
At this last screen you need to copy the access token and save it for use later in MyBotChat setup page.
4. Setup MyBotChat
Assuming that you already created a bot and trained it.
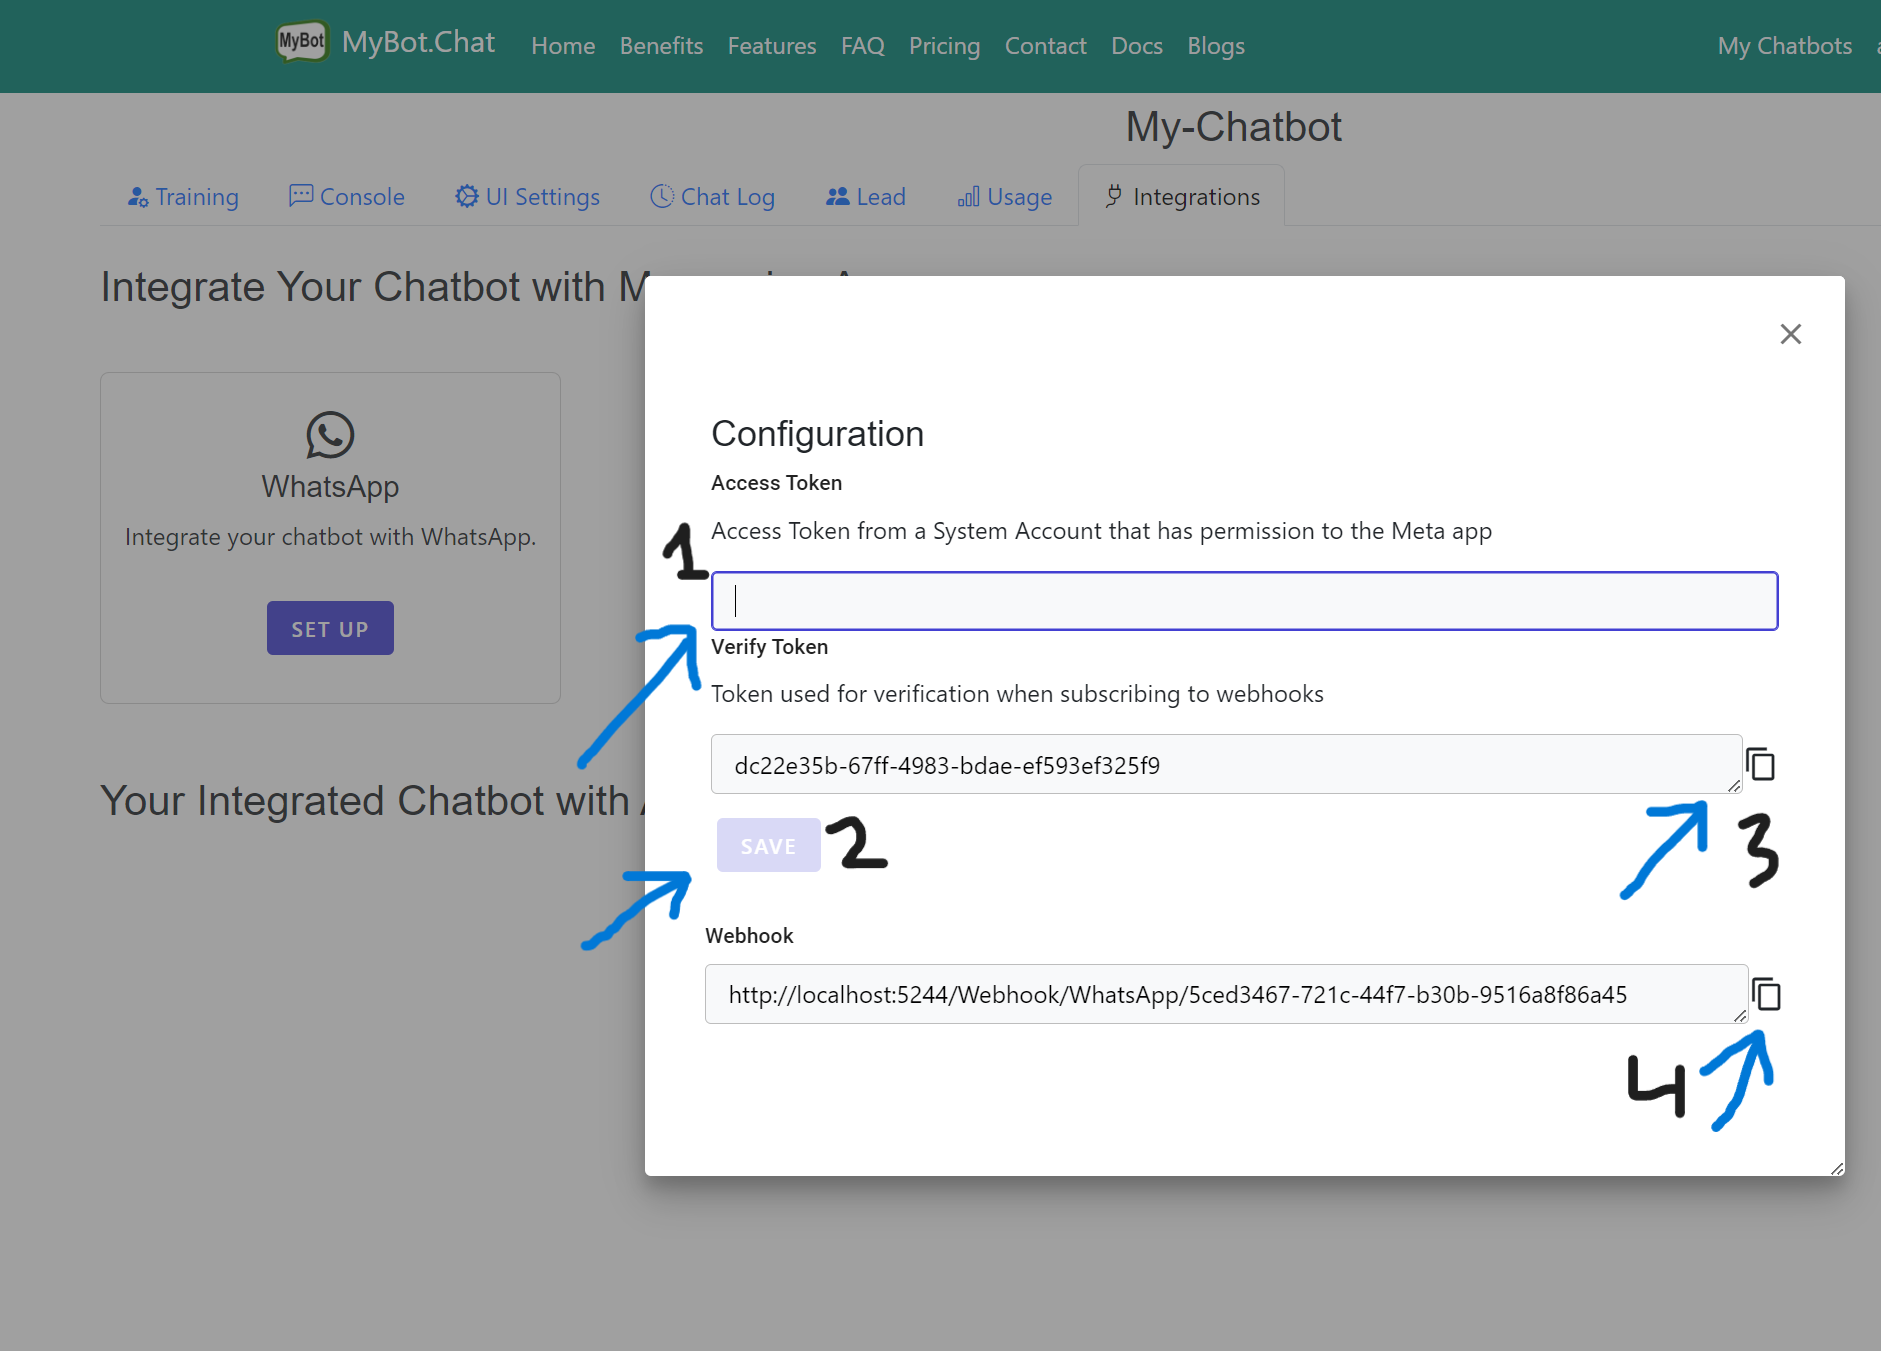
- Go to "My Chatbots" and click "Integrations" tab to access the integration page.
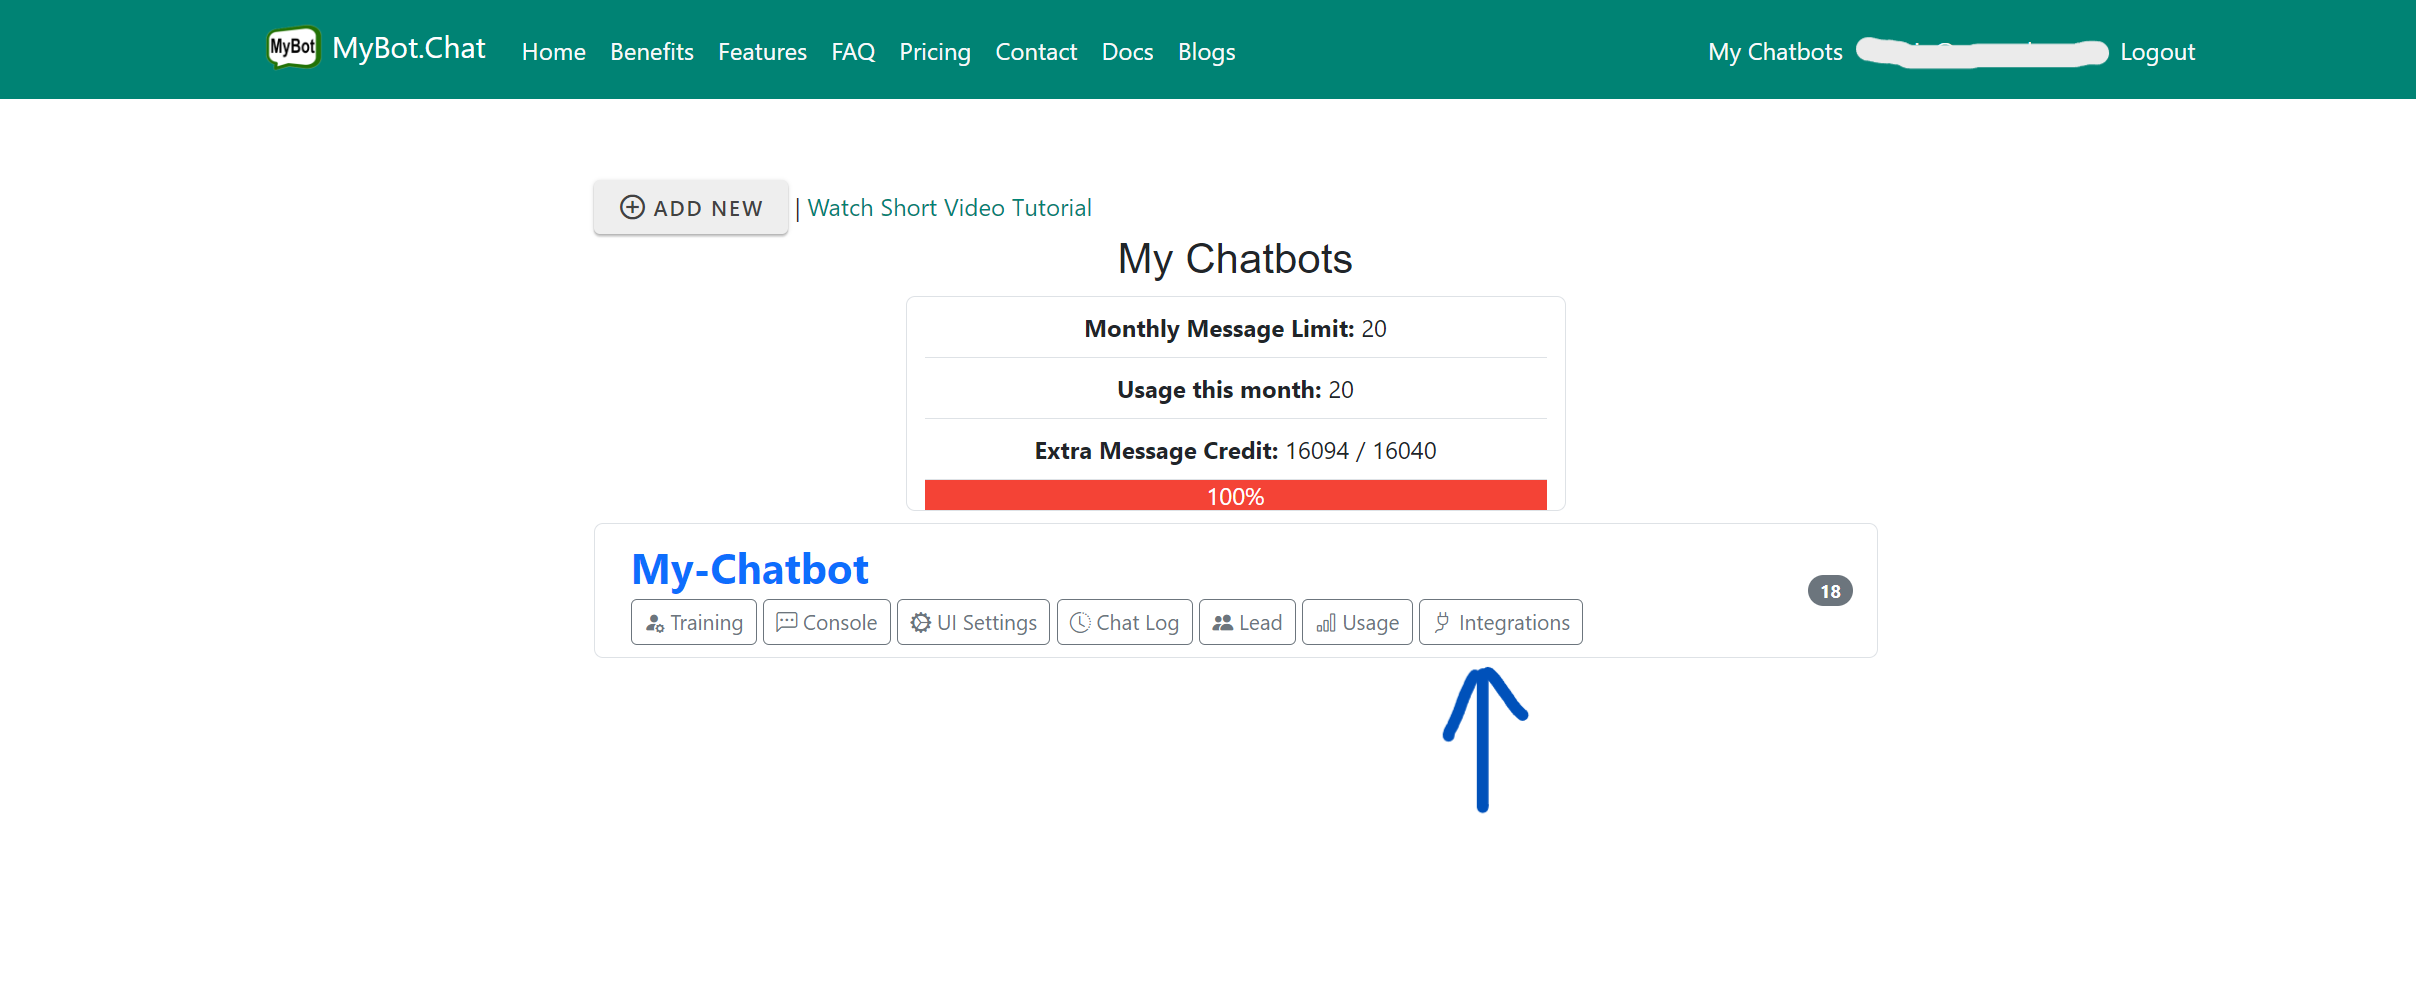
- Under "WhatsApp" integration box, click "Setup"
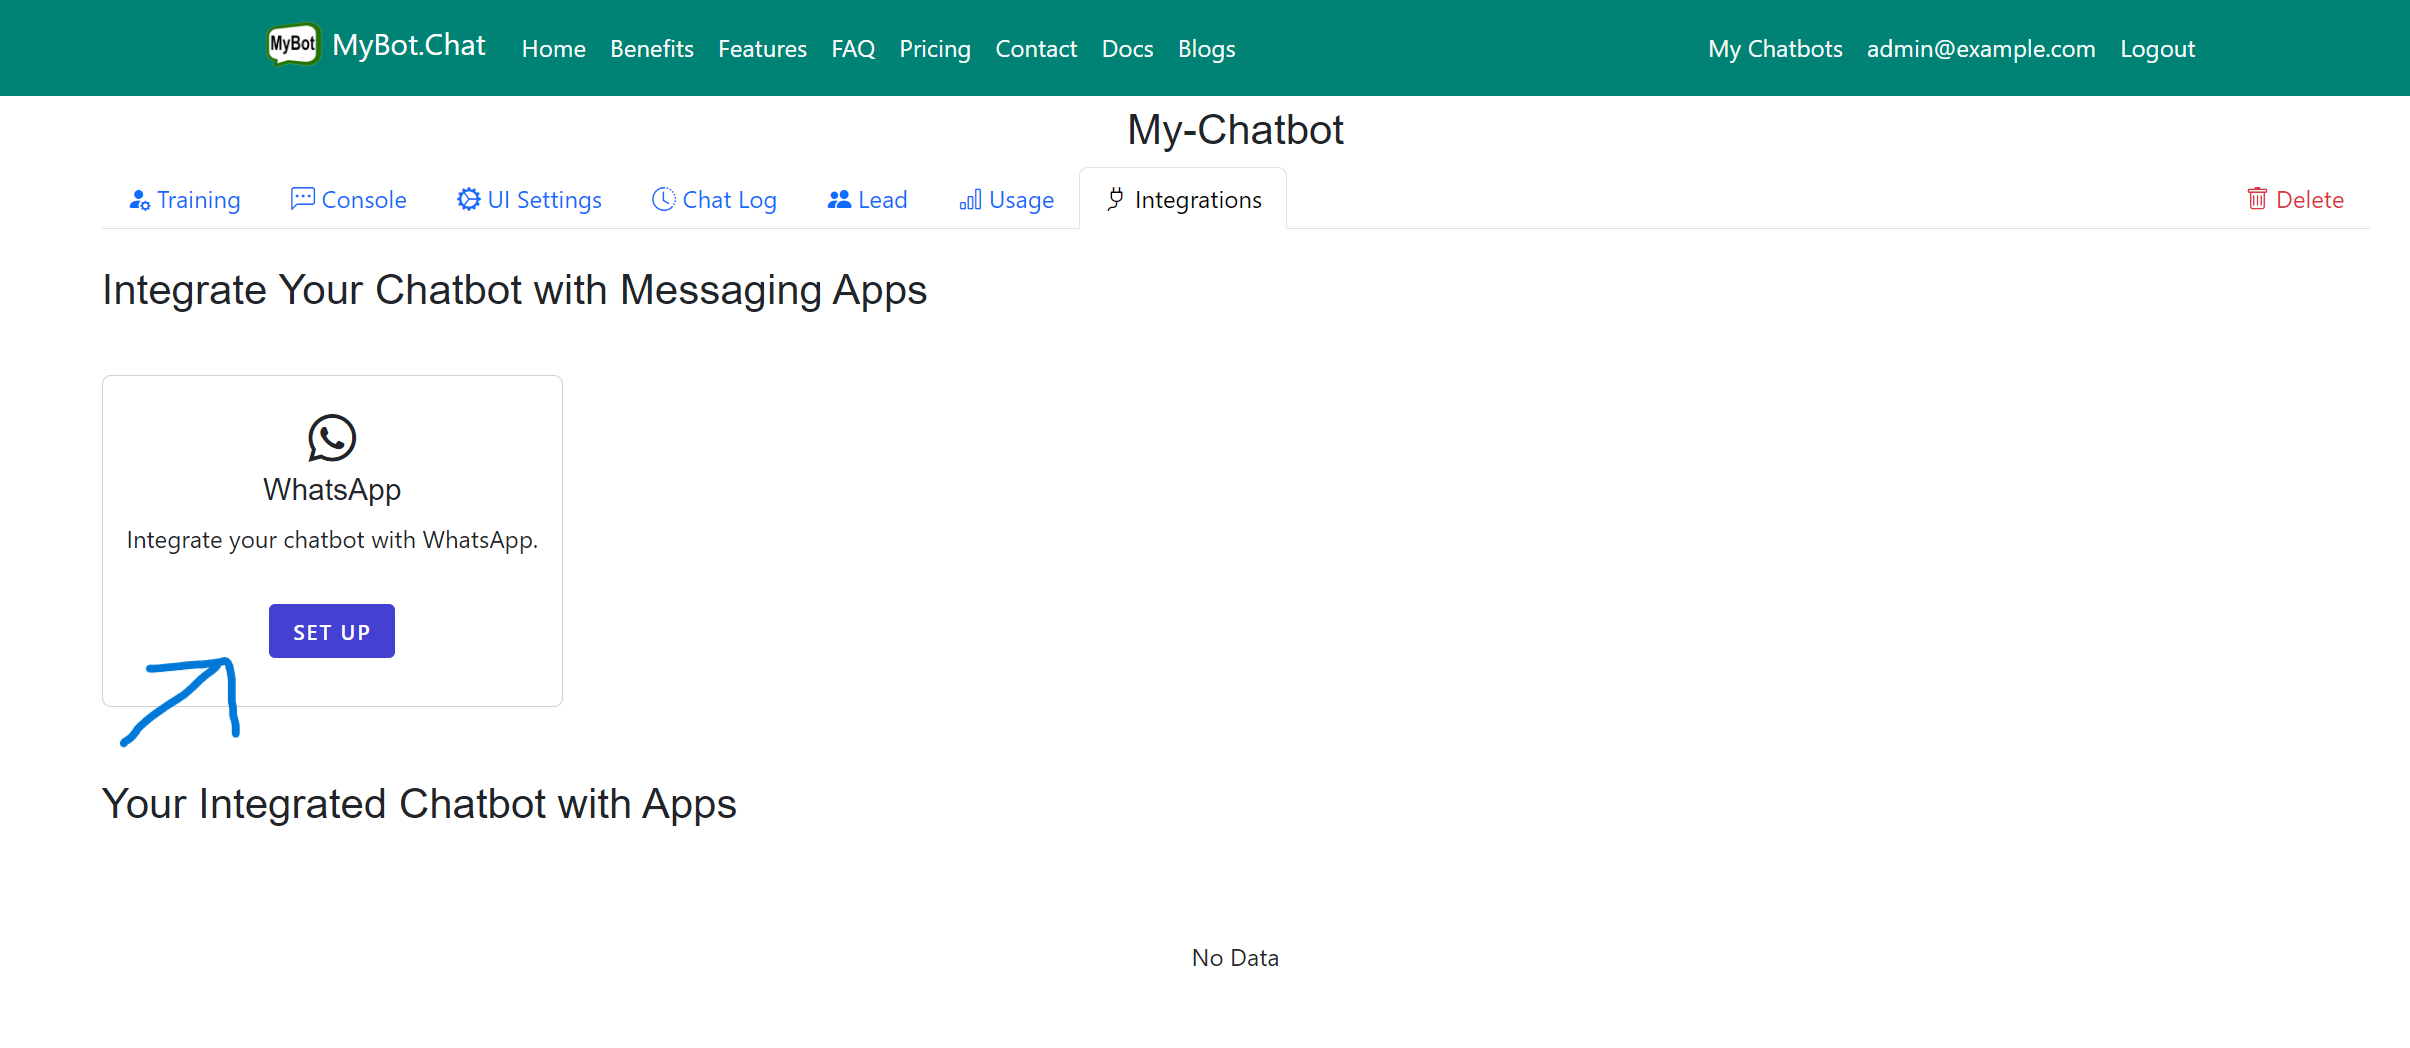
- Past the Meta Access Token you got from previous step.
- Click on Save button to save this Access Token in MyBot.
- Copy the Verify Token for use in Meta App in the following step.
- Copy the Webhook URL for use in Meta App in the following step.
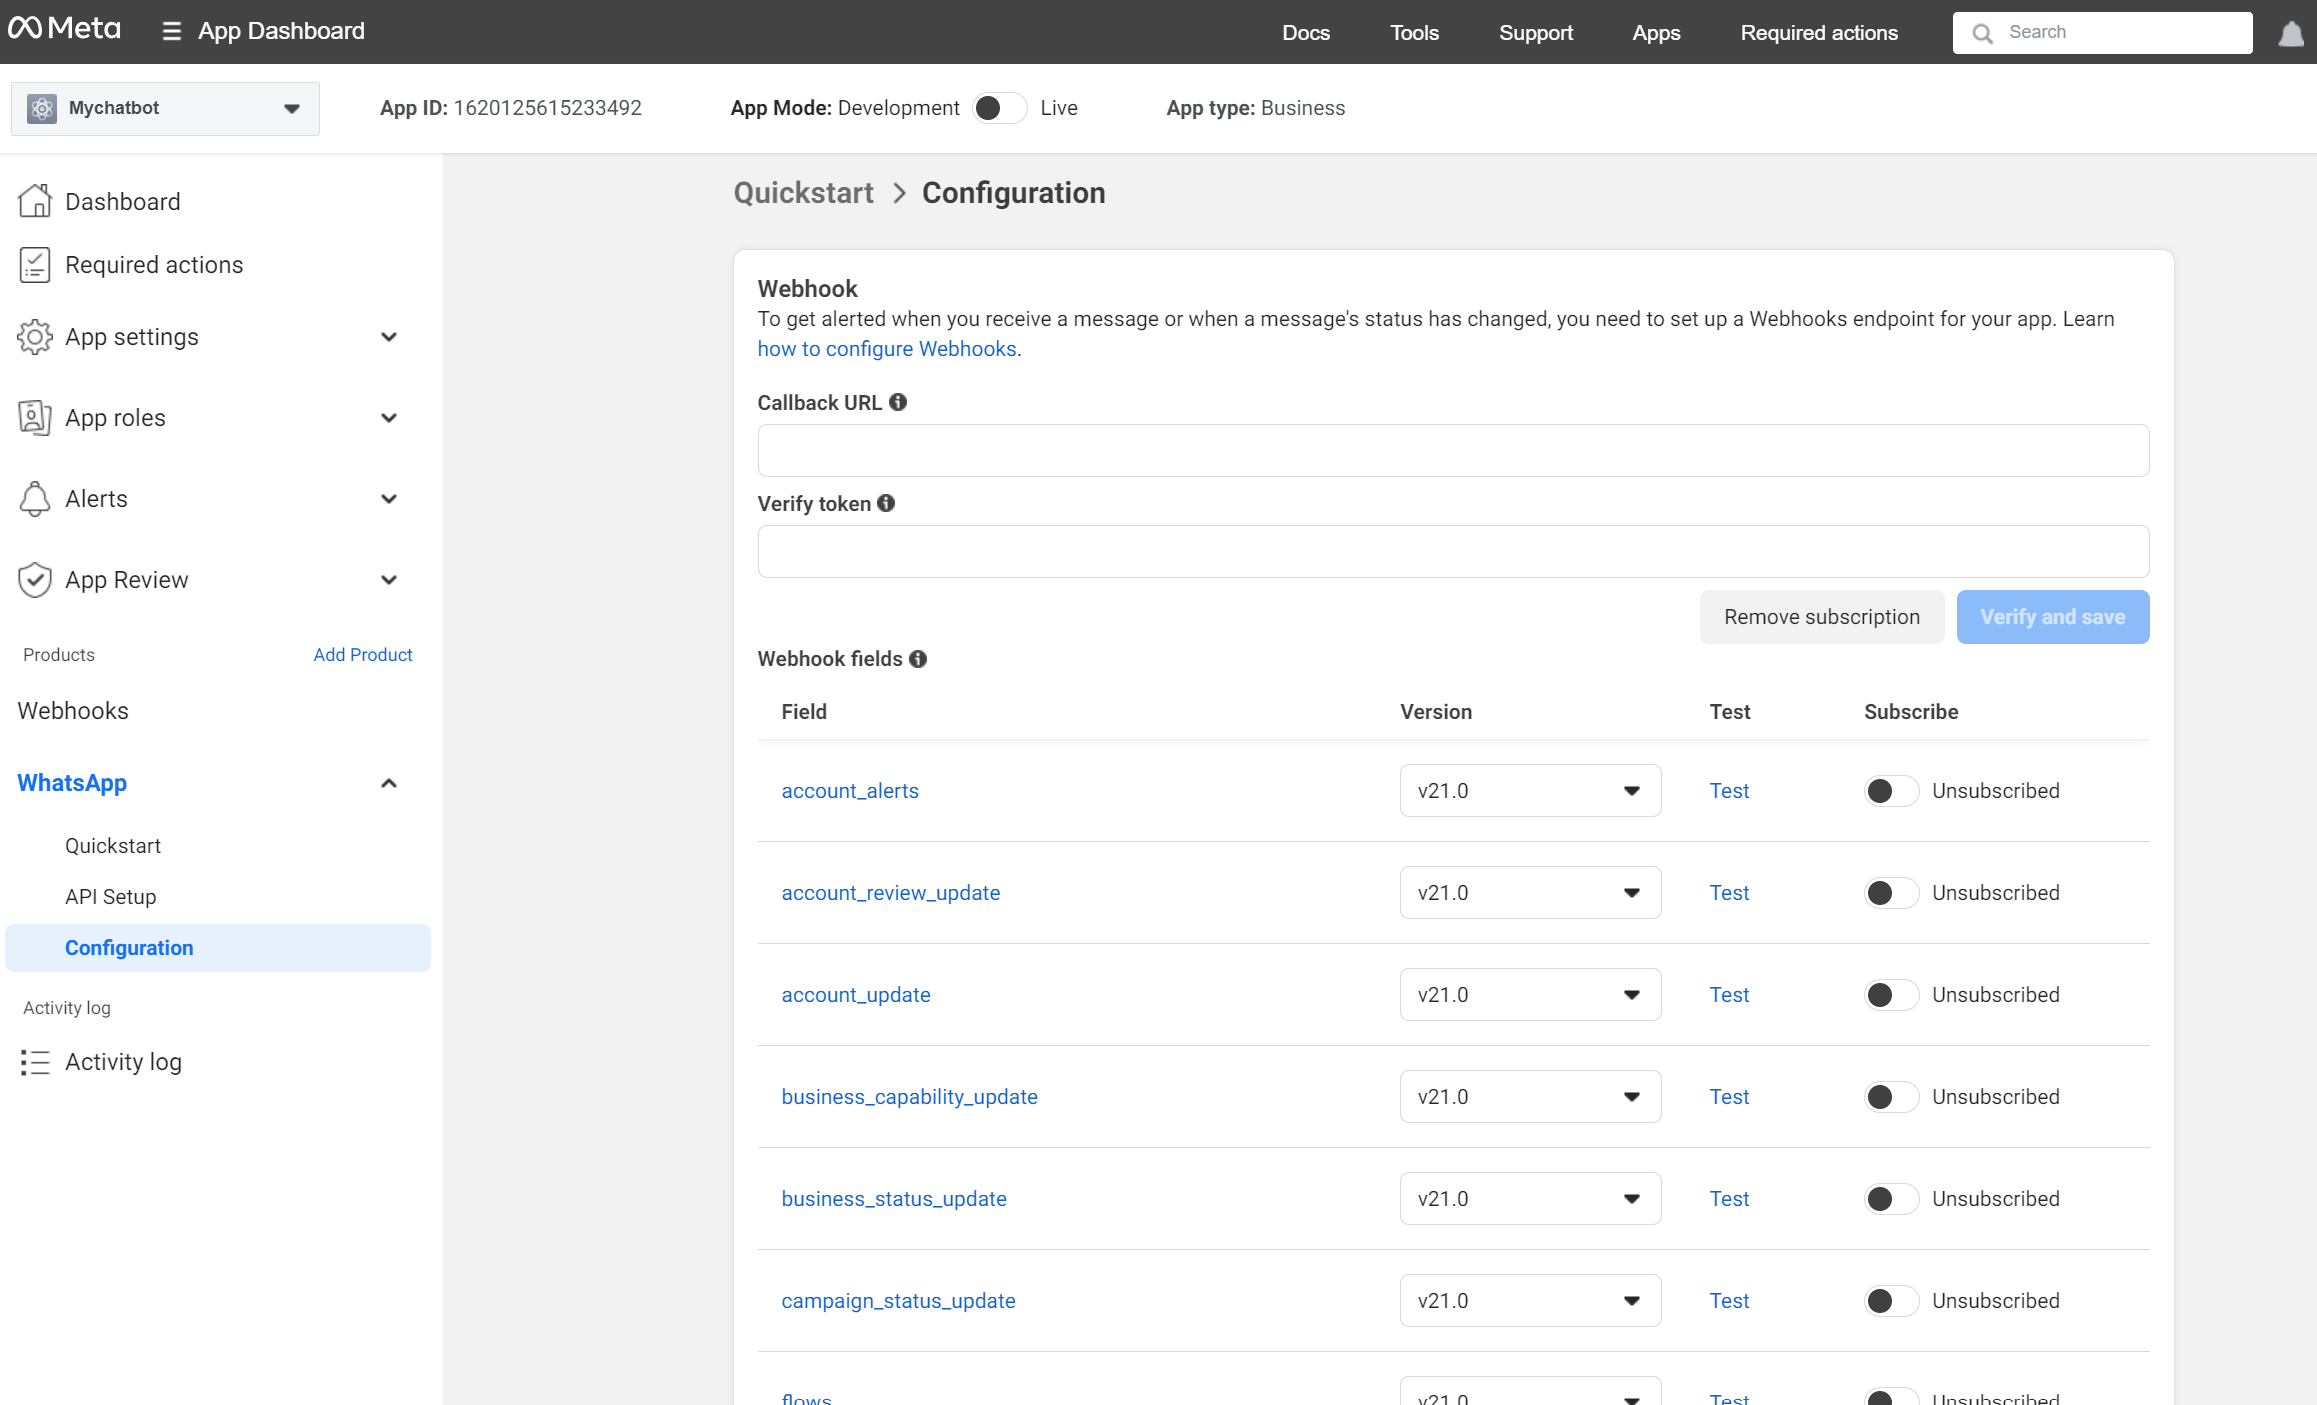
Example screenshot of Create Webhooks webhook setup:
5. Set Up Webhooks in Meta App
Continuing from previous section, configure the callback URL and verify token from your MyBot to connect WhatsApp with MyBot Chatbot.
- Past the Webhook URL you copy from the previous section into Callback URL input box.
- Past the Verify Token you copy from previous section into the input box.
- Scroll down the page to see the optiont subscribe for messages.
Example screenshot of webhook setup:
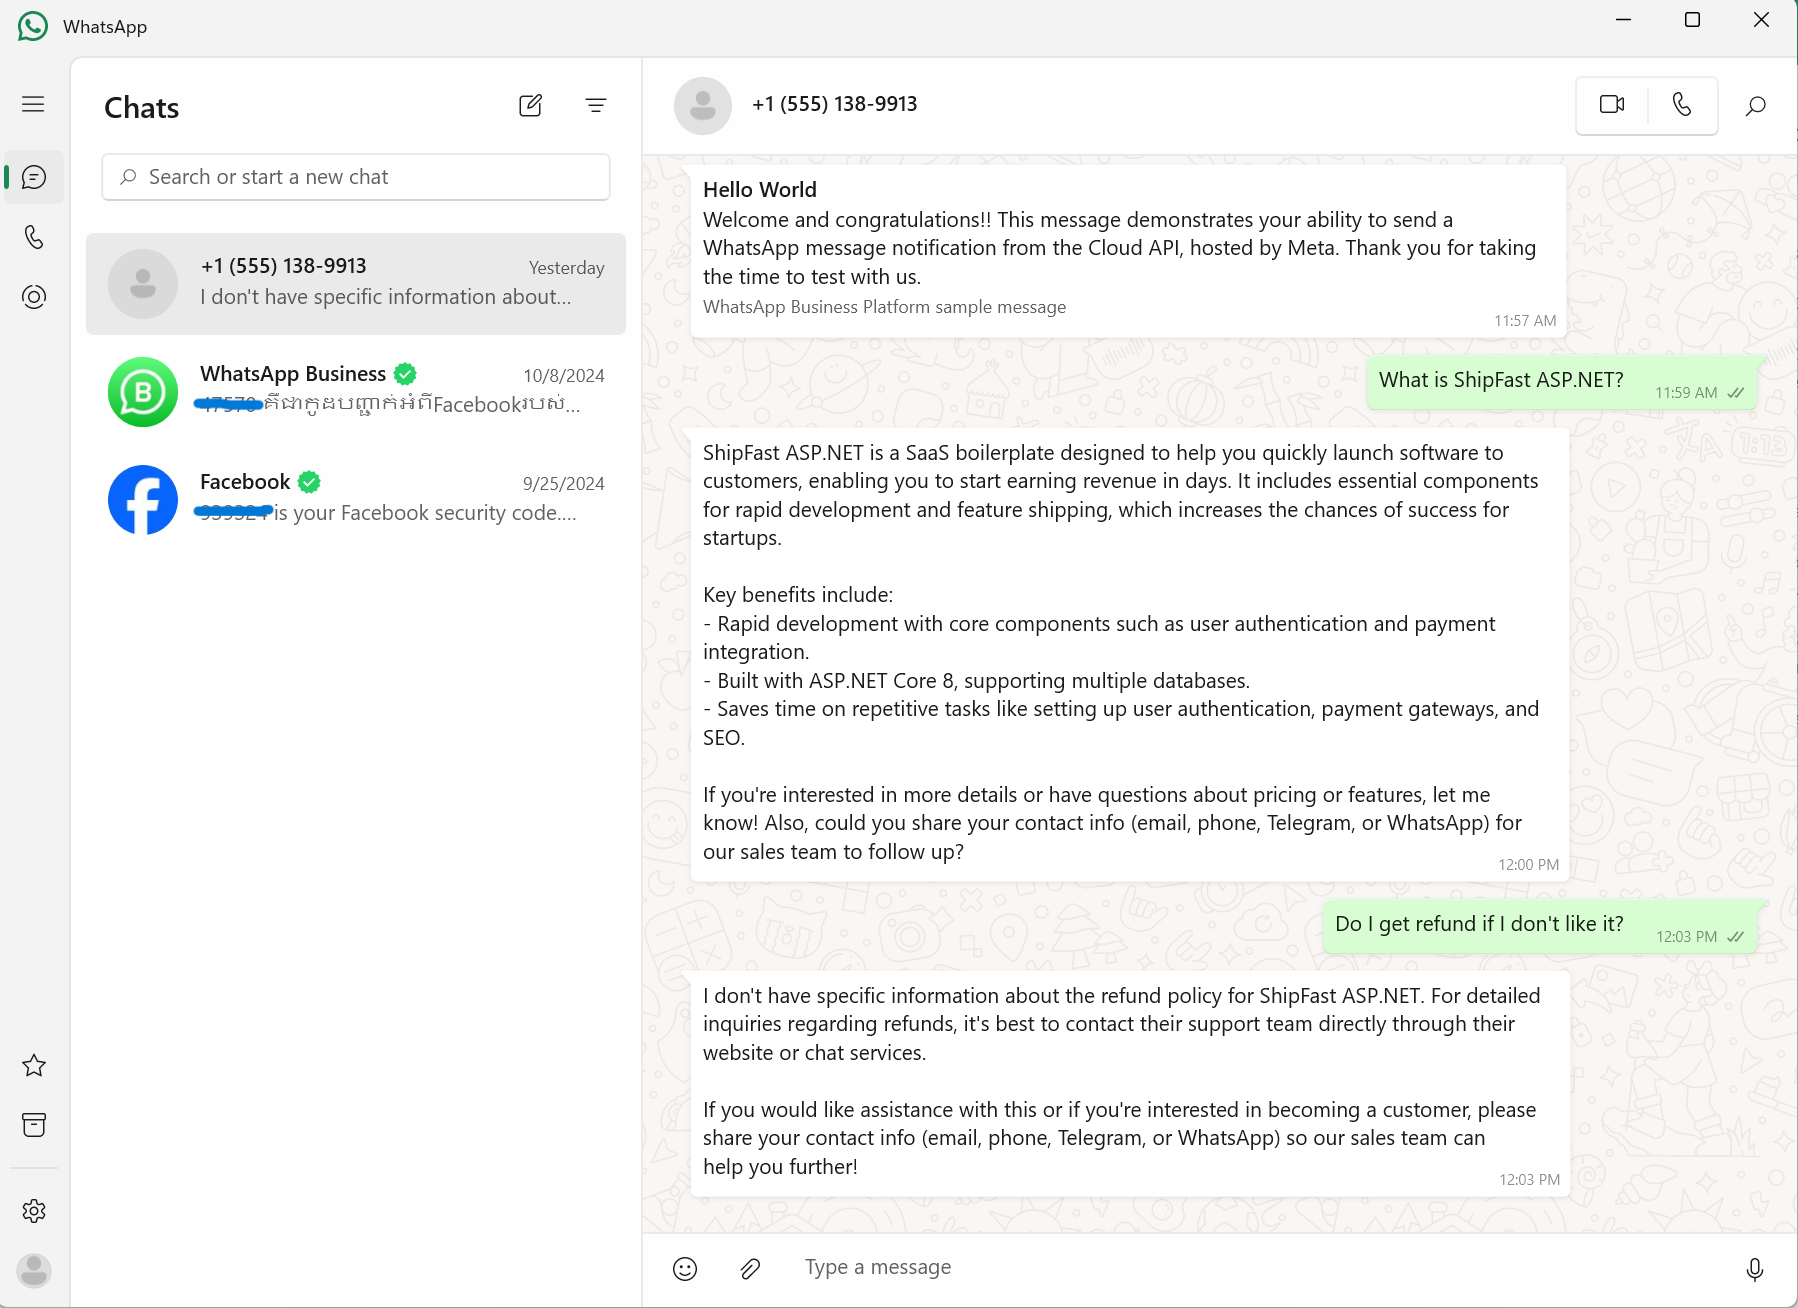
6. Test the Integration
- Send a test message from WhatsApp to your registered phone number.
- In your WhatsApp account, you should now see this message received and processed by your chatbot.
Example screenshot of testing the integration:
